¶ SiT5501 - Elite X User guide
¶ GETTING STARTED WITH EVALUATION :
When the user clicks the LoC link, they will land on the cloud-based UI LiveBench for evaluation of SiT5501 as shown below. The user will see the overview page, from which the user is allowed to go through the User Guide and Board-related documents to understand the process of Evaluation using LiveBench setup for better understanding and user handholding.
1. Click on the “PLUG IN” (Fig 2) as shown in the below picture.
.png)
2. Once clicked on “Plug In” (Fig 3) it will change to “Initializing” (Fig 3.1) for a few seconds until the system gets ready, and then “Ready” appears indicating that the system is available for evaluation.
.png)
3. The "PLUG IN" (Fig. 2) button will change to "PLUGGED IN" (Fig. 4) after the device is prepared, and the UI will connect to the Lab On Cloud setup. Click on dropdown "∨" named “SiT5501” to view features .The system will be ready for the evaluation when the "Progress log" displays the message "$> Start evaluation"
.png)
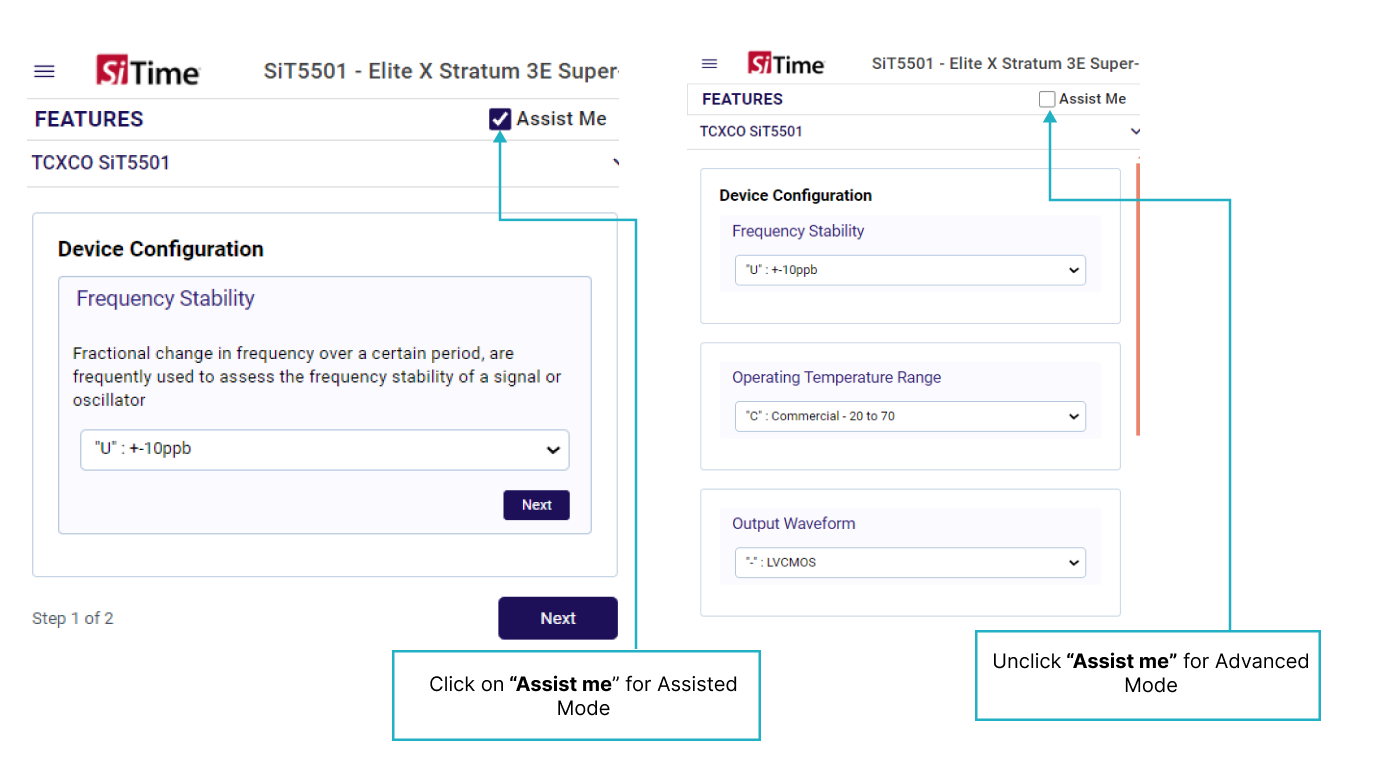
4. When the system is prepared for evaluation, users simply proceed by unchecking the "Assist me" checkbox and use the service, or they can feel free to enhance their experience by clicking "Assist Me" checkbox and use Assisted form of evaluation process flow. It is recommended for a novice user to utilize the "Assisted" (Fig 5.1) based mode, which provides detailed process directions to the user in the form of messages in the evaluation window.
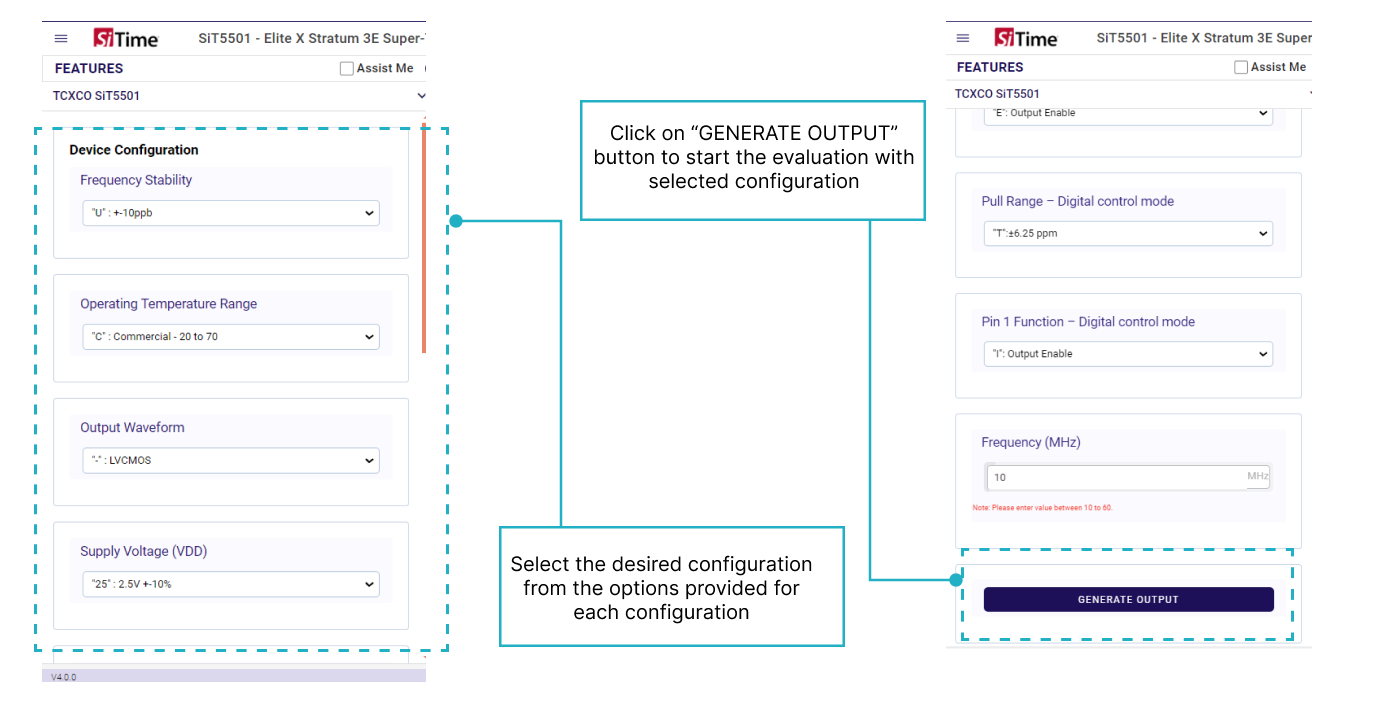
5. From the options, select the desired configuration parameters for VDD, Frequency Range, and Output signaling type (Fig. 6.1). To begin the assessment process after the configuration setup is complete, click the "GENERATE OUTPUT" (Fig.6.2) button
6. Once clicked on the “GENERATE OUTPUT” (Fig 8.2) button, the UI will start processing the data and the “READY” will turn to “In Progress” The “Progress log” will give a message saying “$> evaluation started” (Fig 7).
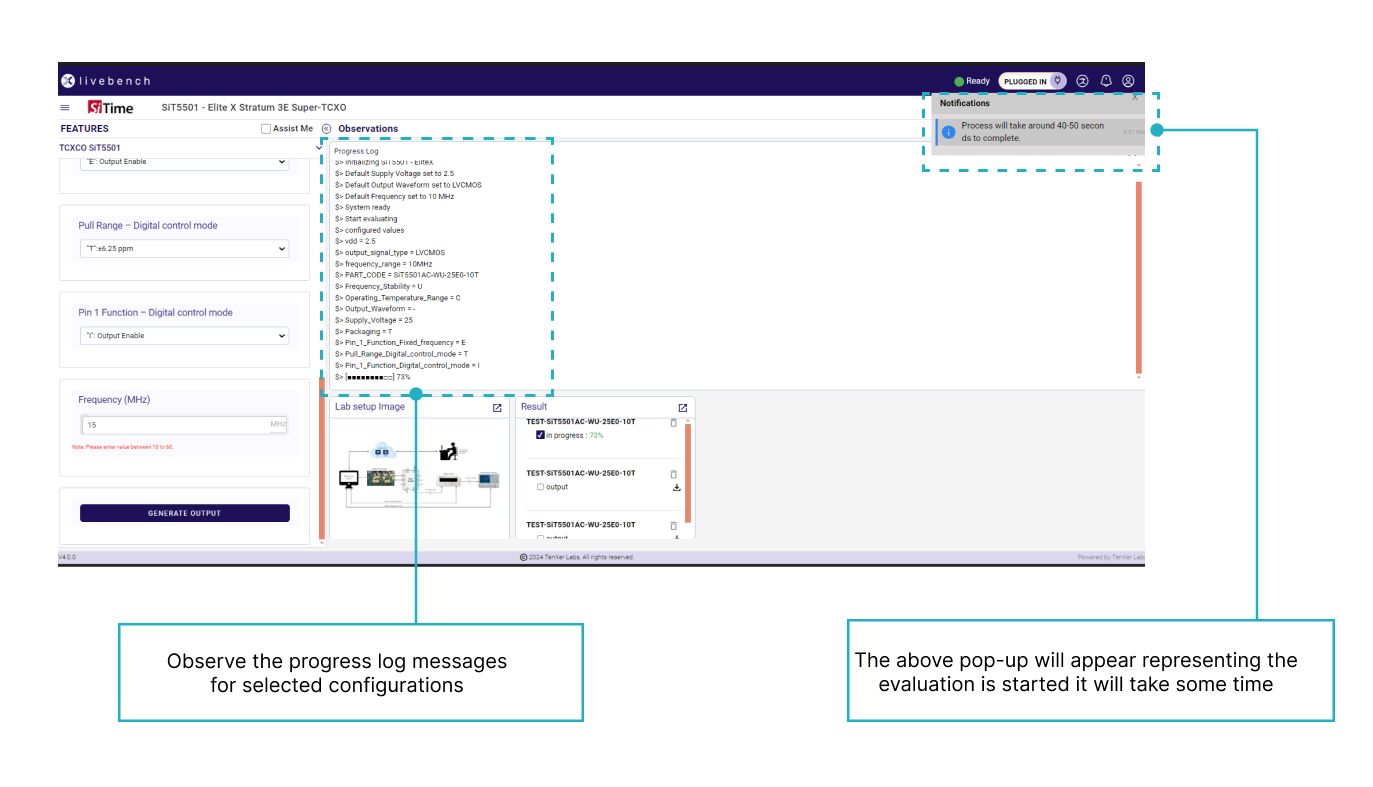
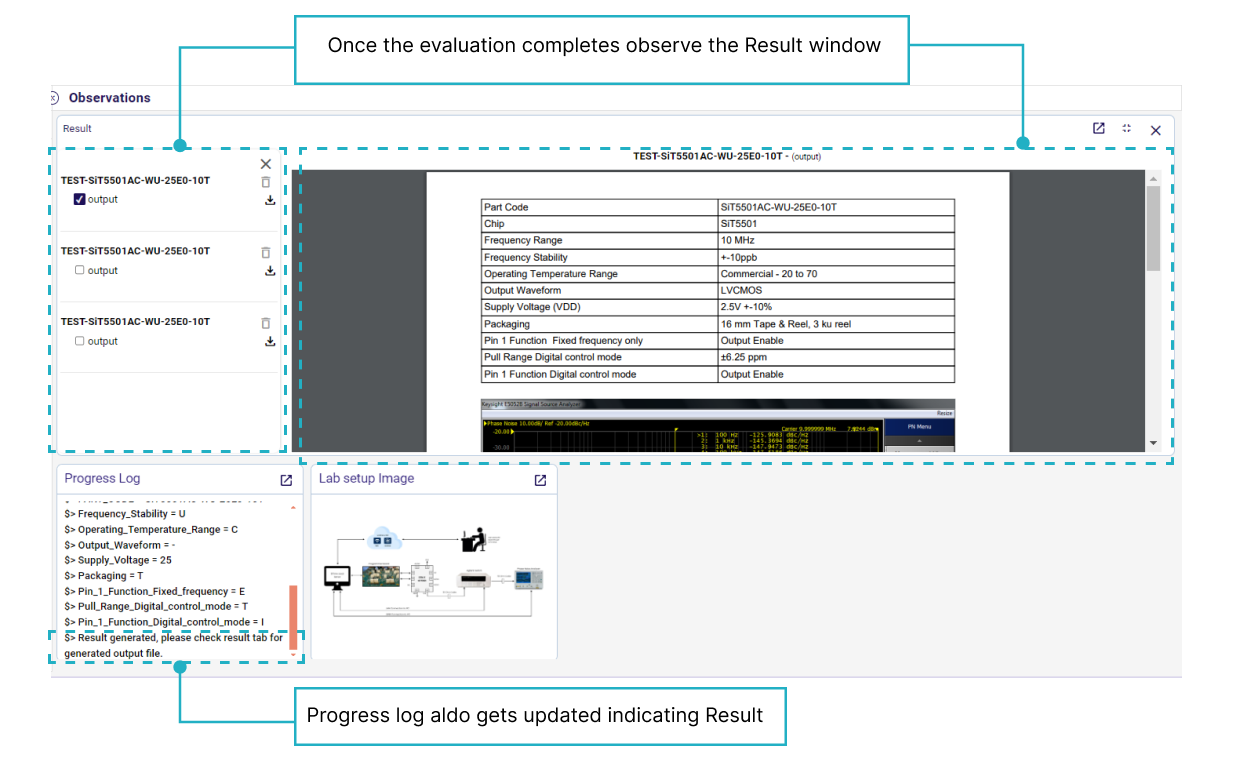
7. Now users can go through the results in the “Result” (Fig 8) tab to observe the evaluation outcome. The user can save up to five test results for future reference or comparison.
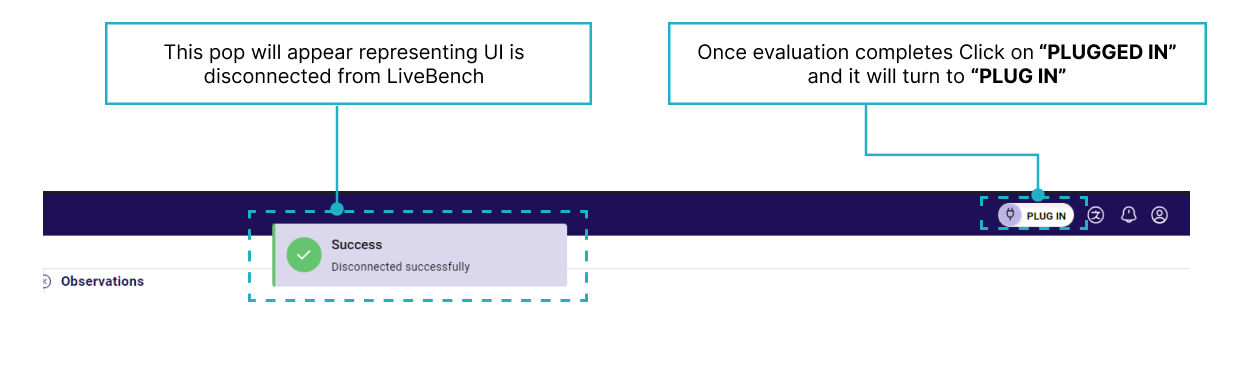
8. Once the evaluation is completed, click on the “Plugged In” button and it will change to “Plug In” , ensuring the device is available for the next user's evaluation.